Firing valve replacement
Written by Ben
Last updated on 2008-01-02
This helps when the firing valve of the water gun can not be opened by the trigger. Sometimes that occurs because of a power modification, other times it just happens randomly. This problem occurs somewhat more often on CPS 2000s, likely due to the higher pressures combined with the large valve, putting a lot of force on the seal, making it hard to pull.
It also can be done if your firing valve breaks in some way.
Either way, it's not something to do on purpose, usually. It removes the option of using a trigger if you use a ball valve. It essentially turns your water gun into a half-homemade one. However, there can be some performance benefits to using a replaced valve. Ball valves perform better due to the potential for high flow they have.
Please realize that the procedure for this repair changes dramatically from water gun to water gun. The procedure done here likely will work only with the CPS 2700, but similar procedures will work with other water guns. This guide will serve as an outline only. This is more than one way to do this repair as well, so you don't have to follow this exactly as written. If you need any help or have any questions at all, please ask at repairs forum.
Materials
Again, because this repair differs so much from water gun to water gun, this list can only be thought of as an outline.
- 1/2 inch threaded ball valve
- threaded 3/4 inch x female socket-weld 1/2 inch adapter
- 3 1/2 inch adapters
- PVC cement
- PVC primer
- Teflon tape
- 1/2 inch PVC pipe
- some 1/2 inch threaded caps (for nozzles)
- 1/4 inch tubing barb x male threaded 1/2 inch
- 1/2 socket-weld x 1/2 inch female threaded x 1/2 inch socket-weld PVC tee
The tools you will need include a hacksaw, a wrench, scissors, and a drill (drill press or hand drill will do).
Instructions
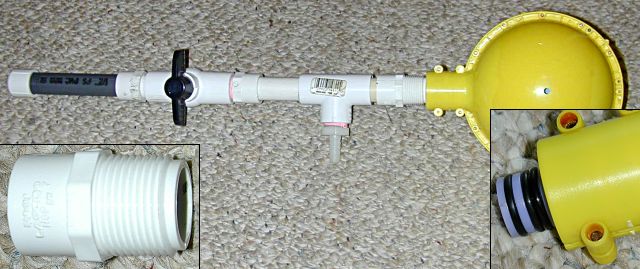
The image above shows the PVC structure I made to replace the old valve assembly. The pressure chamber was one of the male types (the fitting goes inside of another). The male type pressure chamber seals onto a 3/4 inch adapter. Here I am using a male threaded 3/4 inch x female socket-weld 1/2 inch adapter because 1/2 inch PVC ball valves are cheaper than 3/4 inch ones and the flow would be the same between each one. The hole inside of the pressure chamber is only about 1/2 inch in diameter.
On the male ended pressure chambers, I am unsure what you should do, so post on our repairs forum.
Prime and cement the PVC structure before continuing. Check our FAQ for how to solvent weld if you need to learn how to do that.
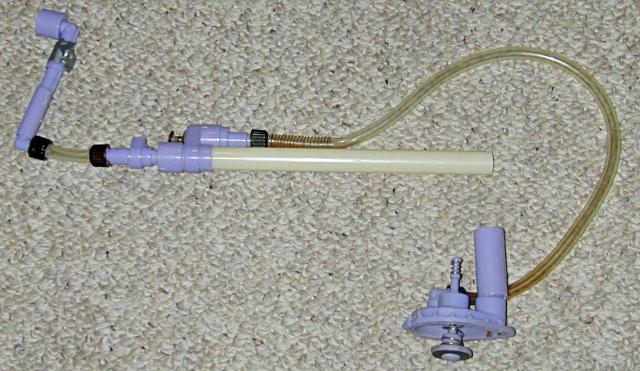
The new valve assembly has to attach to the tube here.

Cut the tube and get a tubing clamp to attach it.

You don't need to attach it here like I did, but this is what the entire thing looks like put together.
Now we have to modify the case to get the new pieces to fit. The tubing will actually come out of the gun the way I designed this repair to be done. So, we have to cut a hole in the case to allow for this.
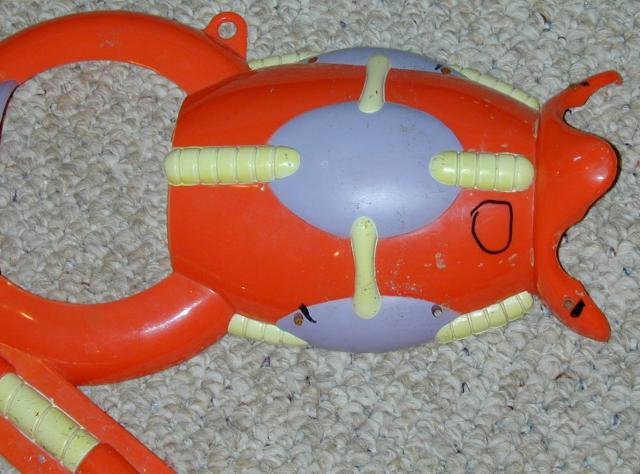
The circle shows where I must cut. I did this cut with two passes of a drill (the first being a guide hole and the second being the larger one). You also can do it with a dremel or whatever else you have that could cut a hole in something else, like a hole saw.
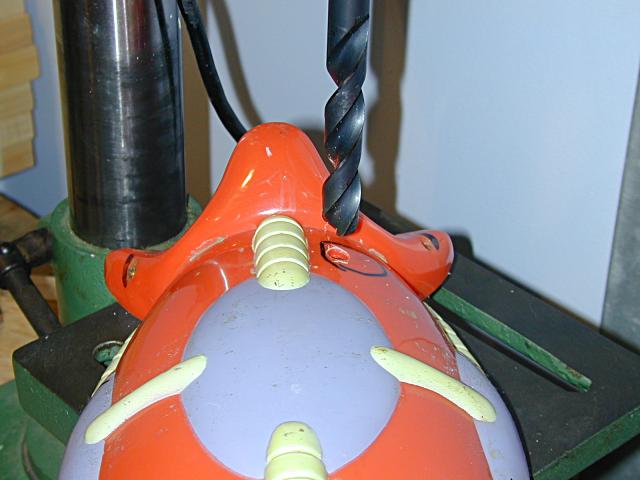
Here I am about the drill through the case with a big 5/8 inch drill bit.
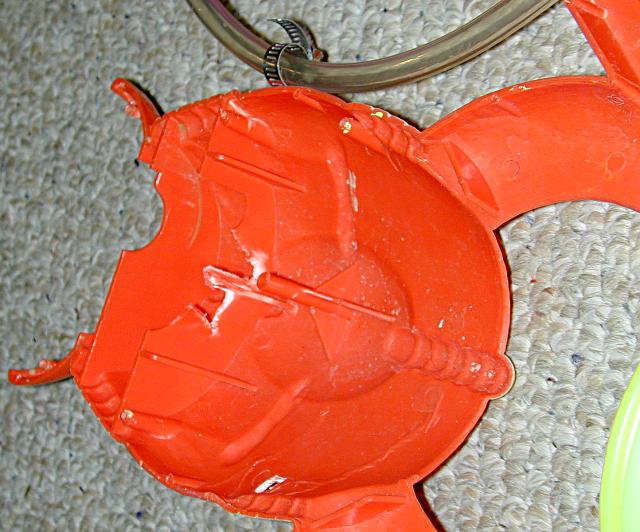
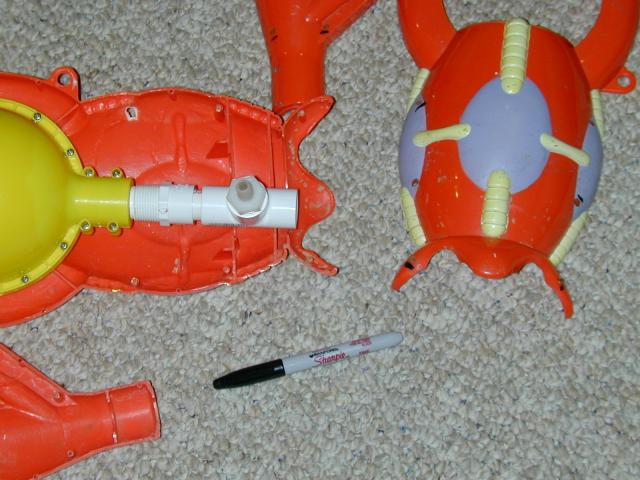
It might not be completely obvious from this picture or angle, but I ripped some of the case out so I could fit the new valve assembly in. The valve assembly went though the new hole to the hole that was there in the end. Depending on which gun you repair, this step will be markedly different, so just remember that you have to find a way to fit everything in the case.
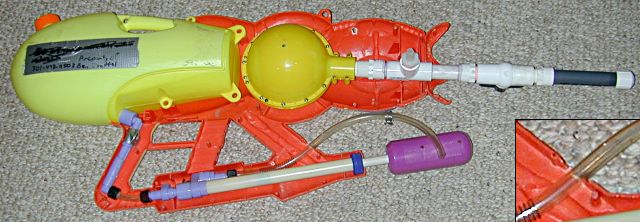
This picture shows everything put into the case. The image in the lower right corner shows the cut I made with a dremel to let the tubing out of the case so it can attach with the tubing barb that will also be outside of the case.

Here's a closeup on the connection before the clamp was put on. Note that the tube is folding on itself a bit. I should have got a barbed coupler and two more tubing clamps to give that tube more slack. Right now the tube can easily close off, making pumping impossible. I would suggest adding some more slack if you can.

Closeup on the barbed fitting with the clamp on it.

An overview of the entire gun once completed.
Nozzles
This water gun now uses 1/2 inch threaded nozzles. How to make them is shown in the APH guide. Just remember that the APH usually uses 3/4 inch nozzles, while this gun uses 1/2 inch.
Operation
Operating a water gun repaired in this manner is different than a normal one. There is no trigger. The ball valve must be opened and closed by turning its handle. The handle parallel with the pipe means the valve is open, and when it is closed, the valve is perpendicular to the pipe. The valve must be closed when you're done with the shot. It does not operate like a trigger where taking your finger off the trigger closes the valve.
Valves with triggers can be made, but I did not make one here and I don't imagine that most people will. But, if you can make a triggered valve, you regain the trigger, which some find important.