APH construction
Written by Ben
Last updated on 2007-12-25
The "construction" phase is more about preparing for the cementing than actually constructing the water gun. Here the water gun starts to take shape.
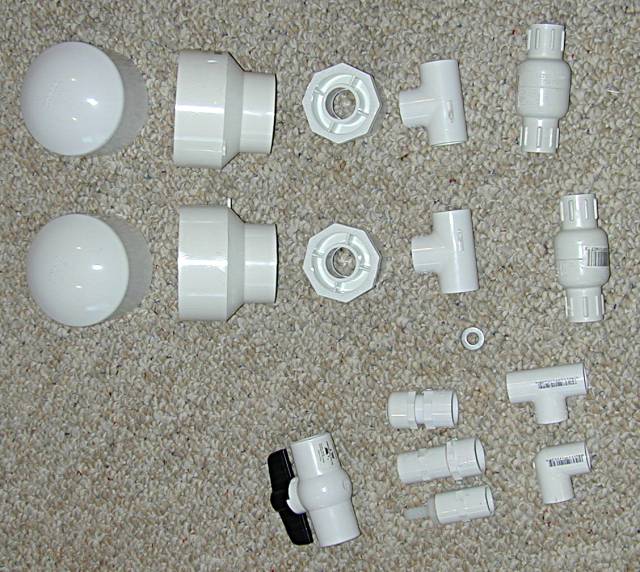
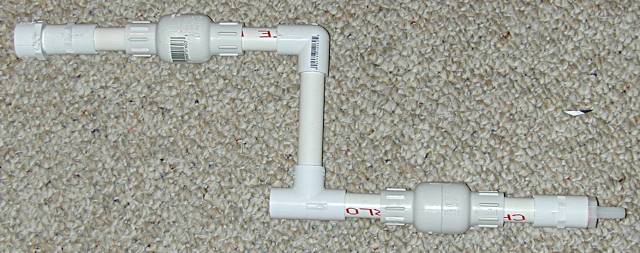
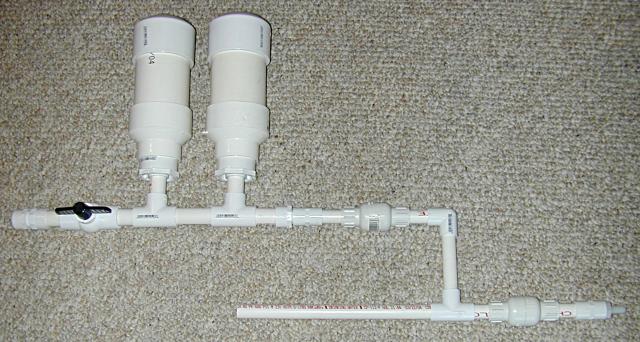
The above image is all you need to construct this water gun. It shows the parts and how they connect to each other. Understanding how the parts connect to each other is important to cement the gun together correctly, so you should feel comfortable putting together the gun from memory from the parts alone. That task isn't that hard if you understand how a water gun works because you know why each part is where it is.
Note the direction of the two check valves indicated by the arrows. The valves must be pointed towards the pressure chambers. There are arrows on these valves. Check valves are one-way valves, and the arrows indicate the direction of the flow. You want to pump water into the pressure chambers from the backpack or the built in reservoir, but the water has to stay in the chambers. That's why the valves are there. When the pump is pulled forward, one valve prevents it from pulling water from the pressure chambers, and the other valve opens to let water come from the reservoir. When the pump is pulled back, one valve opens to let water into the pressure chambers, while the other valve closes to prevent the water from being pumped back into the backpack. The orientation of these valves obviously is very important. If either one is put in incorrectly, the gun will not work.
Also note the washer placed between the pump and the tee. That washer is there to prevent the pump dowel from going too deep into the water gun. It is not required, but very highly recommended to prevent potential problems.
Lastly, this water gun uses a homemade water backpack. There is no on-board water reservoir. Check out our backpack page for instructions on how to build a backpack and our customizations page to see how to build an on-board reservoir.
Above are all the PVC fittings set out on the table in the shape of the competed gun. None that none of the PVC pipe is here. Laying out pieces like this gives you a good idea of how the water gun will turn out. I do this when I'm planning a water gun to see how all the pieces will fit together. Sometimes due to size restrictions that aren't obvious in your mind, your plans might need some changes. This step is good for any water gun you construct.
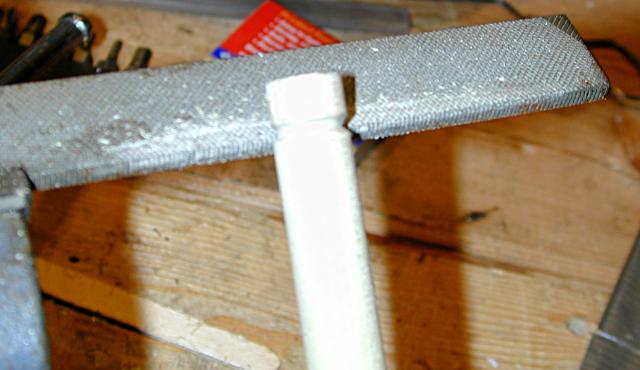
The bend fitting above has a rough spot left from the construction of the fitting. Since this fitting is part of the handle, the rough spot should be removed to make it as comfortable as possible. Due to the flash the rough spot isn't completely visible in the image above, but you can see it's outline against the clamp. Use a file or sandpaper and remove the rough spot. Any rough spots should be smoothed out.
The image above shows all the PVC pieces you'll have to cut. A list of them is below. If you need to learn how to cut PVC, read the PVC basics page.
- 5 2-inch pieces of 3/4 inch pipe
- 1 3-inch piece of 3/4 inch pipe
- 2 5-inch pieces of 3 inch pipe
- 4 2-inch pieces of 1/2 inch pipe
- 1 5-inch piece of 1/2 inch pipe
- 1 12-inch piece of 1/2 inch pipe
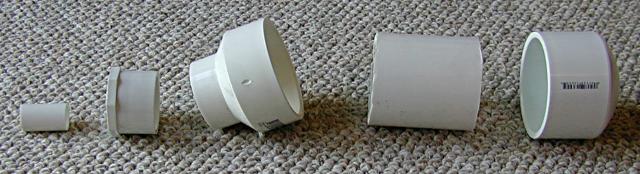
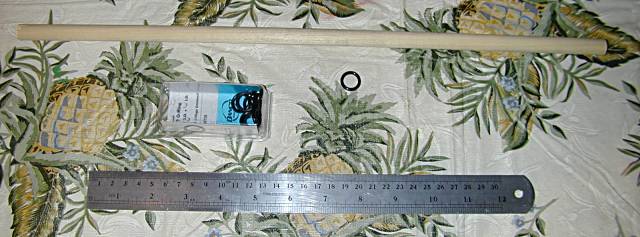
Above are all the PVC parts that do not need to be cut.
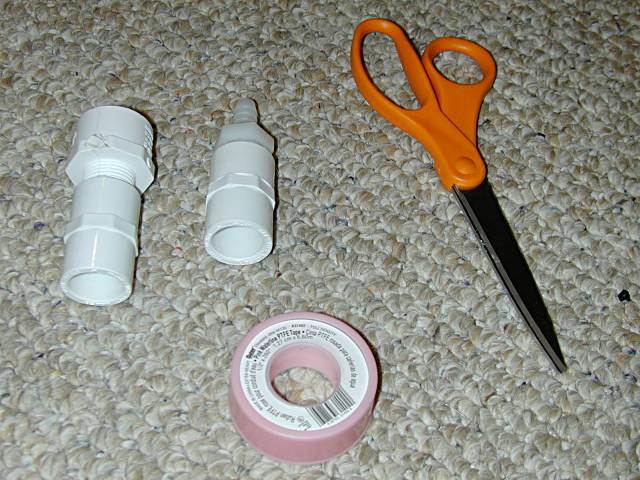
These pieces need teflon tape applied to the threads to make screwing them together easier and to improve the seal. Get your teflon tape, the parts above, and scissors.
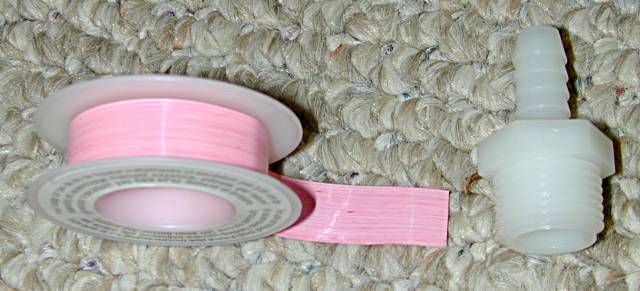
You will need to wrap the tape around the male threads (the "screw on" part) of the tubing barb above and the threaded male adapter shown a few images below. Wrap the tape around so that it goes in the direction of the turn to ensure that the tape doesn't bunch up when turned. To explain in more detail, the barb above screws into the other PVC fitting away from you if you place it on the right with the other PVC fitting to the left. Therefore, you want to start putting the tape on towards you so that the end points towards you and will be pushed more back towards you as you turn.
Put two layers of teflon tape on, but no more. More does not help the seal. More simply stresses the PVC fitting it is being screwed into.
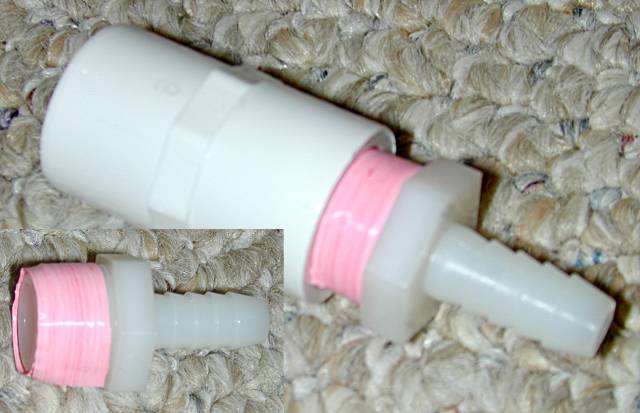
The image in the corner above shows how the tape should be oriented on the barb and male adapter. The larger image shows how they should appear when screwed together.
Apply teflon tape to the other pair of parts so they are like the image above.
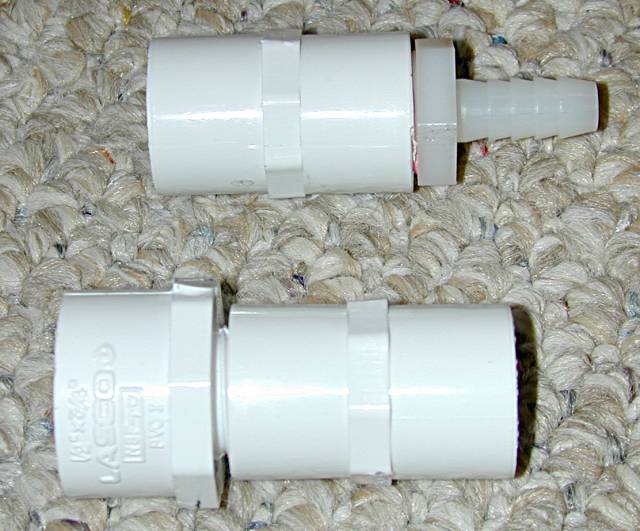
Screw the parts together tightly. The image above is a little too tight, but it shows that the parts are screwed in deeper. Don't go all the way so that the fitting bottoms out, but don't be too loose. If the female fitting (the one with the hole) begins to bulge out, loosen the fitting out. If the parts are in too deep, the female fitting will be stressed and can crack.
Start assembling the pieces into a water gun. Here I started adding the two pieces I finished above and the check valves. Again, note the direction of the check valves. The arrows should point towards the pressure chamber indicating that the water flow will go in that direction.
Don't push together the pieces too deep. You are only assembling the pieces like this to get a good idea of how the water gun will appear when completed. This step is not required, but it allows you to check that you have every piece and know how to assemble the gun.
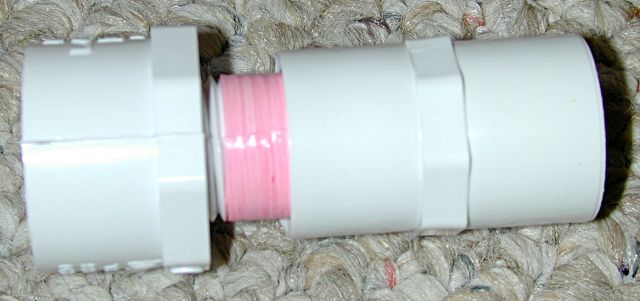
The image above shows how the pressure chamber pieces fit together.
All of the parts are put together, showing how the water gun will appear when completed.
Now the pump needs to be constructed. I will be making a pump from a wooden dowel because wood is strong, cheap, light, and makes a perfect seal. Originally I doubted the usefulness of wooden pumps because I saw them as weak, but they are plenty strong for water guns and seal great. The seal improves because the wood expands as it gets wet. Wood therefore makes great pumps.
The method I detail here might be good for some, but a different method also can be done. Check out that page to see how to make a pump handle too. The standard APH is simple, and it lacks a pump handle aside from the wooden dowel itself.
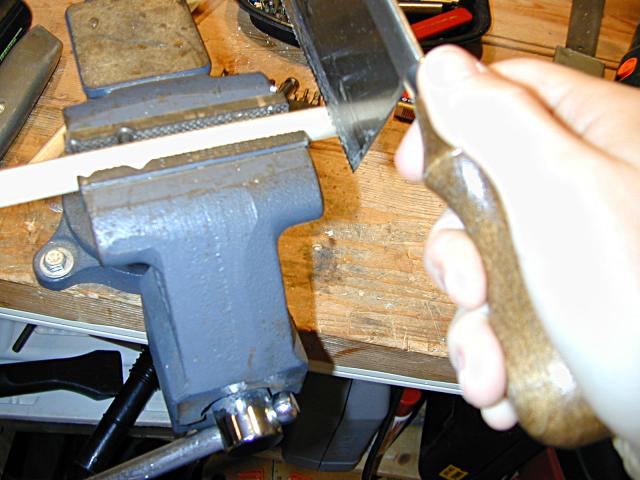
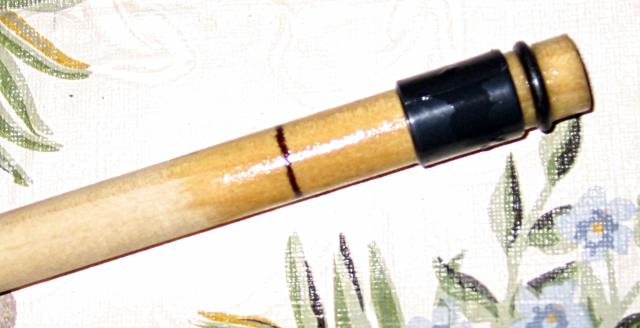
Put the dowel in a clamp and cut a thin strip into the wood around the entire dowel. The dowel should have a valley in it that goes around the entire dowel. This valley will hold the rubber O-ring seal.
Expand the valley with a file until the O-ring fits snug into it. Test out the wooden dowel with the O-ring in the valley in a piece of PVC pipe. If the pipe moves too slowly around it or moves the O-ring off the dowel as the dowel is moved, then the valley could either be too small or too large. You'll have to experiment until you get the valley shaped correctly. It too me two times to get the valley right. The second time, I used the other end of the dowel. The third time, you will have to cut the dowel a little shorter to start again.

I put a few wrappings of electrical tape around the dowel to prevent the pump from going through the PVC cap that closes the pump. The electrical tape might also help with the seal and straighten the pump out.
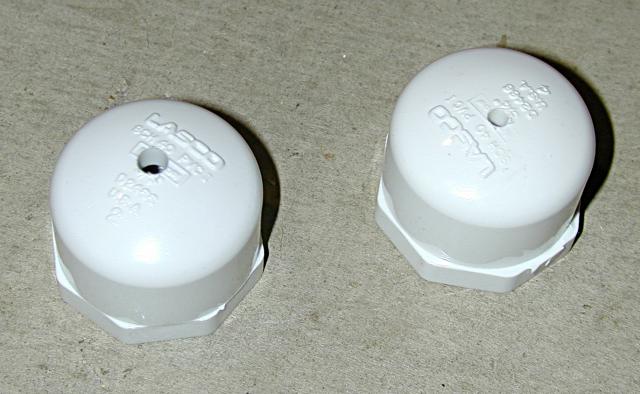
Also note that I have taken the one 1/2 inch unthreaded PVC cap I had and drilled a 1/2 inch hole in it to allow the dowel to go through the cap. If you need to know how to drill holes, read PVC basics.
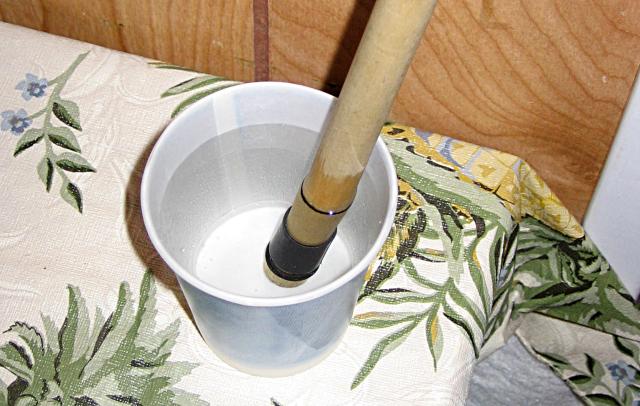
Put the dowel with the seal in a cup of water to let the wood absorb the water. As the wood absorbs the water, it expands, pushing the O-ring out and making a good seal.
The pump has been wet. I would suggest putting the pump into a piece of PVC pipe to see how well it seals at this point. If it seals poorly, any number of things could have gone wrong, so post at our forum about your problem and we'll try to help.
If the pump seals but moves slowly or jerkily, don't worry because you will lubricate it later with vaseline, and as the pump moves the lubricant is spread, so pumping becomes easy.
Drill the threaded cap nozzles you want now. Again, PVC basics details how to do this.