RolandTower's Ultimate Water Gun
Written by RolandTower
Last updated on 2008-01-07
Alright, here are instructions to make a water gun. I know this much is completely safe. If you really, really, want to, you should be able to figure what additional steps are necessary to increase chances of death. If you do that, however, please realize the severe risk you are taking and be incredibly careful.
General stuff you'll need
- adjustable wrenches, the longer the handle the better
- flat-head screwdriver
- coarse file
- power drill
The Gun Parts List
- Teflon sealant tape
- 1 1/4" hose connector @ 1/4" male NPT
- 2 3/8" hose connectors @ 1/4" female NPT
- 4 1/2"x1/4" brass reducing bushings
- 1 1/2" brass female T
- 1 1/2" stop/waste valve
- 1 1/2" brass ball valve
- 1 1/2" brass pipe cap
- 1 1/2" x 8" pipe nipple
- 1 1/2" x 5" pipe nipple
- 1 1/4" x 1/2" brass pipe nipple
- 2 1/4" x close brass pipe nipples
- 2 small pipe clamps (be sure they can tighten to < 1/2")
- 6' of 3/8" high pressure hose, preferably nylon-reinforced PVC
- Caulk, sealant foam, or epoxy
Directions
1. Take the 5" pipe nipple—this is going to be the handle of the gun-and fill it with the caulk/epoxy/foam/sealant of choice. This isn't really necessary, but it reduces the amount of water that will get stuck in the line after each use. Set it aside to dry.
2. Get a lot of Teflon pipe tape. It's going to be your good friend here. On every single joint, you're going to want to use about 6 turns of Teflon tape-enough that the threads start to become less defined. Remember: always wrap Teflon tape clockwise around the threads, so it doesn't come undone when you screw in the pipe! Also, get your adjustable wrenches ready. You want to tighten the joints very firmly, but not so much that you damage the threading.
3. Now to assemble the gun. Remember: copious amounts of Teflon tape, use two wrenches to tighten each joint. Starting at the nozzle: take the 1/4" hose connector and screw it into a 1/2"x1/4" reducing bushing.
4. This goes into one end of the 1/2" ball valve.
5. The valve then screws onto the 1/2" x 8" pipe nipple.
6. The other end of the nipple screws into one side of the top of the 1/2" female T.
7. Attach another 1/2"x1/4" reducing bushing to the other side of the T.
8. Using a 1/4" x close pipe nipple, connect one of your 3/8" hose connectors @ 1/4" female NPT with the bushing you just added to the T.
9. Stick one end of your 3/8" high-pressure hose onto the newly-attached hose connector. Make sure that it's pushed all the way down and sits flush with the base of the connector. Slip on one of the pipe clamps and use a screwdriver to tighten it as much as humanly possible.
10. Use your other 3/8" hose connector on the other end of your hose. Strap it on with a pipe clamp.
11. Use a 1/4" x close pipe nipple to attach a 1/2"x1/4" reducing bushing to the threaded end of the hose connector.
Note: If you can find 3/8" hose connectors with 1/4" male threads, use them instead, since you won't need the close pipe nipples and will have fewer joints. I just couldn't find any.
12. The 1/2" stop/waste valve goes on the bushing.
13. And another 1/2"x1/4" reducing bushing goes on the other end of the valve.
14. Take your 1/4" x 1/2" brass pipe nipple and screw it into the bushing.
15. Finally, go back to the remaining port on the 1/2" T and screw in your caulked-solid 1/2" x 5" pipe nipple, then cap it off with the 1/2" brass pipe cap.
16. Now, go back and double-check all your fittings. You'll have better leverage on many of the joints now, so if you were unsatisfied with how well you could tighten them before, now's the time to finish the job. The final 1/2" x 1/2" brass pipe nipple will probably give you the most trouble; I suggest wrapping some electrical tape around the threads for protection, then using a vise to hold the pipe while you tighten its connection with the bushing.
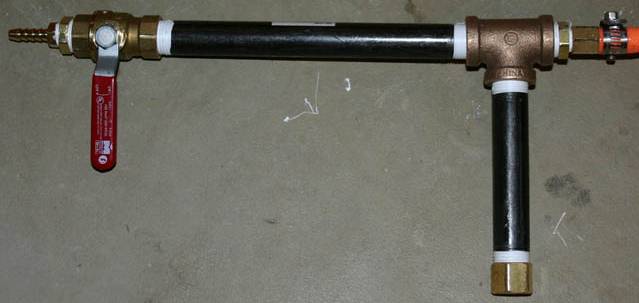
17. The gun/hose assembly's complete. Set it aside for now.
The Tank Ingredients
- PVC Primer, preferably colored (unless you're really sure of yourself)
- Wide paintbrush
- PVC Cement, medium body
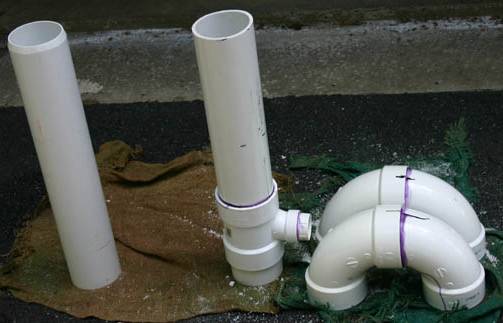
- 2 4" PVC 90 deg. elbows (these have two hubs for ends)
- 2 4" PVC 90 deg. street elbows (these have one hub end and one normal pipe width end)
- 1 4" x 4" x 1.5" PVC Tee
- 1 1.5" PVC socket-to-female-pipe-thread converting bushing
- 1 1.5" PVC cleanout cap
- 1 2' length of 4" sch.40 PVC sewer pipe (Make sure it's pressure rated! Check the side to make sure it has "220 psi" stamped on it!)
- 1 short (about 4") length of sch.40 PVC sewer pipe (See above)
- 1 longer (about 18") length of sch.40 PVC sewer pipe (See above above)
- 1 1/8" male NPT Schrader Valve (this may be hard to find)
- 1 7/16" drill bit
- 1 11/32" drill bit
- 1 1/4" NPT thread tap (You may have to go to a local hardware store or an auto supply store to find this)
- 1 1/8" NPT thread tap (ditto)
- 3-in-1 household oil/WD 40/etc.
Directions
1. Your 4" PVC pipe will probably come as a single 5' or 10' length. What you want to do is make two sides for the tank, each 2' in length. So for one side, just cut a 2' long piece of pipe.
2. For the other side, you want to incorporate the 4"x4"x1.5" Tee. So cut two pieces of pipe, one about 4" long, the other about 18" long.
3. Without any cement, assemble the side of the tank with the Tee, inserting the 4" pipe in one end and the 18" pipe in the other. Compare the resulting length to the 2' pipe that will become the other side of the tank.
4. Now cut away enough of the 18" pipe so that both tank sides are the exact same length. You want the two sides less than a centimeter different.
5. File all cut pipe ends so that they are as flat and squared as possible. Again, make sure your lengths for the two sides remain nearly identical.
6. Find a really well ventilated area, because PVC primer fumes smell like Satan's own evil, caustic, flatulence. Actually, if you didn't already know that from experience, stop.
7. Now, you're going to weld together the side of the tank with the Tee. Take the Tee and one of the two straight lengths of pipe you just prepared. Using the paintbrush, apply two coats of primer each to the Tee and the end of the pipe you're going to be inserting. Then apply one healthy, even coat of cement to both the Tee and the Pipe. All together, you should have applied 4 coats of primer and two coats of cement. Push the pipe into the tee with a turning motion, like you're screwing it in. Hold the two together for 30 seconds, or the pipe will slowly pop back out. Remember: the priming and cementing are of paramount importance, so make sure you're doing a good, thorough job and not rushing.
8. Repeat step 7 for the other length of pipe. After both lengths of pipe are cemented into the T, measure the length against the other side of the tank again just to be sure they're the same.
9. Take the 1.5" PVC socket-to-female-pipe-thread converting bushing and cement it into the 1.5" hub on the Tee, using proper technique (see step 7).
10. Take one 90 deg. elbow and one 90 deg. street elbow. Check them to make sure they fit well without cement; fit the street elbow's normal end into one of the elbow's hubs, and make a "U." If the fit is good, make it permanent with primer and cement.
11. Repeat step 10 for the other pair of elbows.
12. Let everything you've done dry for a day.
13. Before finishing the tank, you're going to tap some holes into the tank that you'll need later. Get together your drill bits, pipe taps, and the two "U"s that should now be dry.
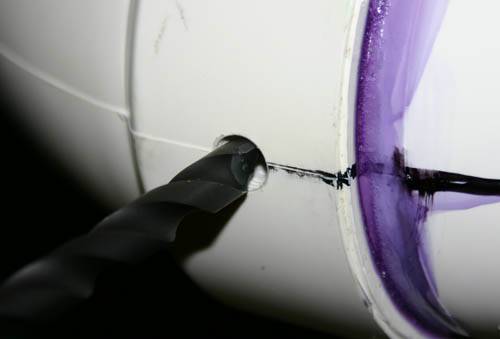
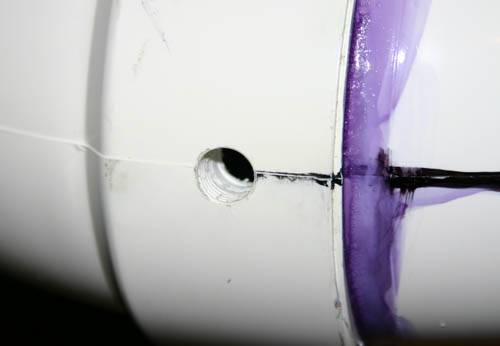
14. Using the 7/16" drill bit, drill a hole in one of the U's right through the joint where the two elbows connect. The PVC is twice as thick there. Since 7/16" is a fairly hefty drill bit, you may want to drill a smaller pilot hole, then widen it. I drilled a 1/4" hole to start, then worked up to 7/16".
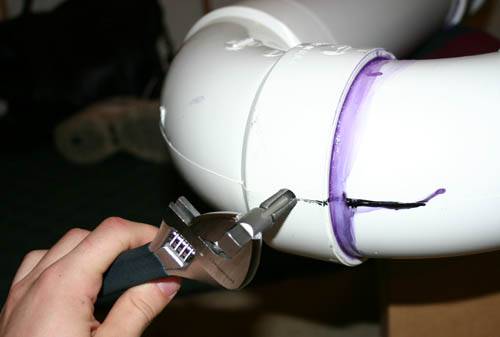
15. Take your 1/4" NPT thread tap and cut threads into the newly-drilled hole. First, give the tap a quick coat of 3-in-1 household oil/WD 40/etc. Then, using an adjustable wrench to turn and applying constant downward pressure with your free hand, slowly screw the tap into the hole. Once again, don't rush. Make sure it's going in straight. After screwing it in a little ways, begin to back it out a quarter turn after every half-turn you screw it in-in other words, half turn clockwise, quarter turn counter-clockwise, half-turn clockwise, quarter turn counter-clockwise, etc. This keeps the threads you're cutting nice and clean. Note that you do not have to thread the entire hole-just cut enough threads that the 1/4" x 1/2" brass pipe nipple from your gun/hose assembly will be able to bottom out.
16. After cutting the threads, rinse them down with a little water to get rid of any PVC bits hanging around.
17. Repeat steps 14-16 on the other U, but using the 11/32" drill bit and the 1/8" NPT thread tap.
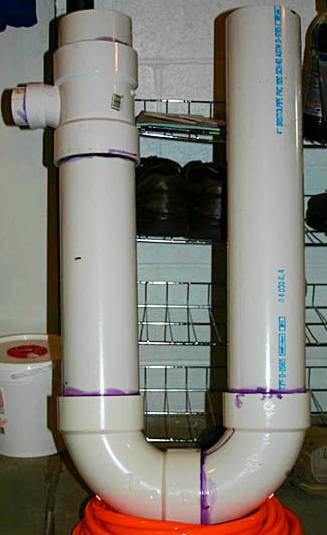
18. Almost there! Take the U with the larger (7/16") hole. You want to fit it onto the sides of the tank such that: a) the longer pipe is between the Tee and the U, not the 4" one, and b)the 1.5" opening on the T is facing out of the tank. After you have both sides of the tank arranged the way you want them, cement the joints using good technique (see step 7).
19. Let it dry for a day.
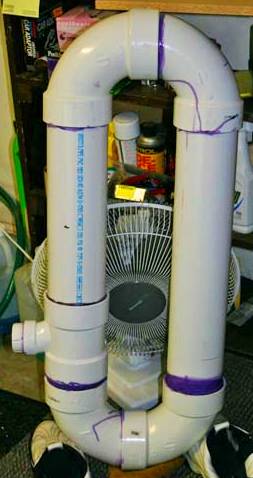
20. Now comes the trickiest part, and I recommend you get a second person to help you. You need to attach the final U in one step, which means that you have eight coats of primer and four coats of cement to apply all at once. BEFORE cementing, check the fit: you may have to pull the sides of the tank apart or push them together slightly in order to seat both ends into the U at once. Once you have checked the fit, and preferably with the aid of a partner, cement the joints and hold in place until set.
21. Let it dry for a day.
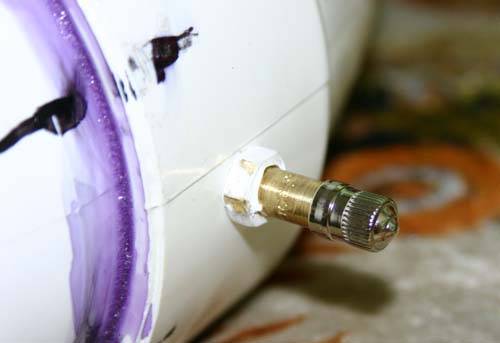
22. Get your 1/8" male NPT Schrader Valve. This might be a tough find. You can get one online from McMaster-Carr (http://www.mcmaster.com/). Anyway, wrap the threads in several turns of Teflon tape, and screw it into the 11/32" hole in the tank until it bottoms out. So close to being finished...
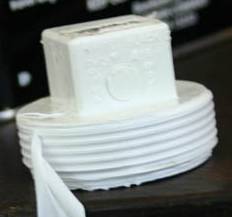
23. Take your 1.5" cleanout cap. Feel around the threads for seams. Using fine-grit sandpaper, sand the seams down as much as possible without hurting the threads. Clean the threads, then apply LOTS of Teflon tape. Use 6 turns or so, then, using a wrench, screw the cap fully into the 1.5" hub on the tee. Remove the cap, apply another 4 turns or so, and repeat until you've applies upwards of 16 turns. Re-apply a few turns of tape after every several uses to keep the seal airtight.

24. The Tank's done. You may begin experiencing an inexplicable desire to travel by foot to Cibo Las Vegas. Ignore it.
Endgame Parts List
- old backpack
- air compressor w/pressure gauge
- scissors
- bucket of soapy water
- spacing device (e.g., a 2.5" wide block of wood)
- large pipe clamps
Directions
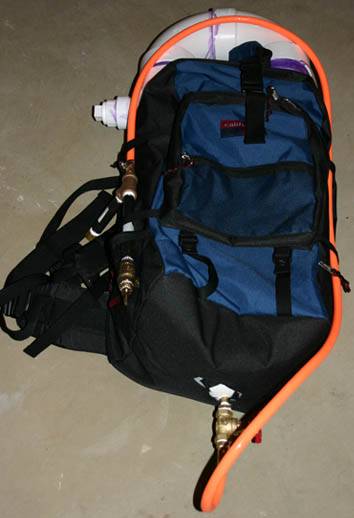
1. Get your old backpack (ideally a camping backpack with a strap that runs over the top of the pack) and insert the tank, valve end up.
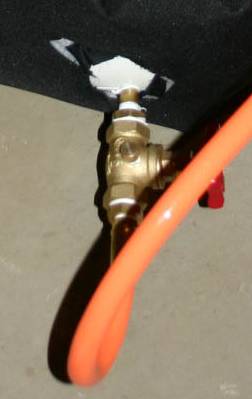
2. Feel around the bottom and figure out where the hole in the tank sits. Cut a hole in the bottom of the backpack there.
3. Get your gun/hose assembly. This is the moment you've been waiting for. Wrap the exposed end of the assembly's 1/4" x 1/2" brass pipe nipple in Teflon tape, then screw it into the hole in the tank until it bottoms out. Now for testing.
4. Screw on the cleanout cap using a wrench to make sure it's in very tight.
5. Whip up a bucket of thick, soapy water. Put soapy water on every single joint. Open the stop valve, but make sure the final ball valve is closed. Hook the air compressor up to the valve and turn it on. Watch the joints for bubbles. If one of your pipe joints starts bubbling, you need to unscrew it, clean the threads, apply new layers of Teflon tape, screw it back in, and run the soapy water test again. If you hit 120 psi (this is safe, 4" PVC is rated to 220 psi, and can actually handle significantly more pressure before bursting) with no bubbling, good work. Turn off the compressor and open the ball valve to let off the pressure.
6. Use it (don't go higher than 100 psi for normal use). Try different volumes of water; I get best results at about 2 gal.: plenty of squirt time, and not much pressure drop-off.
Instructions For Use
1. Open the stop valve on your gun, and close the ball valve. Unscrew the cleanout cap on the tank.
2. Fill with water through the 1.5" port on the Tee.
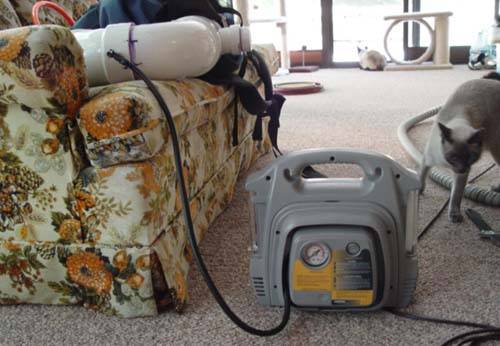
3. Replace the cleanout cap, making sure it's on tight with a wrench.
4. Attach the air compressor and charge the tank to 85 psi. If you do not own an air compressor, a plain old bike pump can be used to build up pressure.
5. Put the backpack on your back, or otherwise make sure that the tank remains upright throughout firing.
6. Profit.
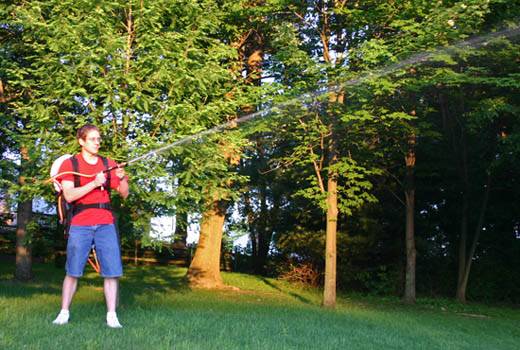
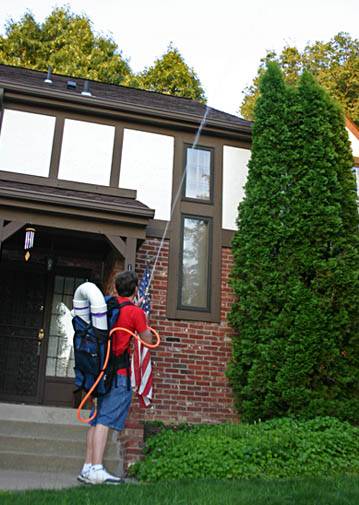
Pictures of the gun firing