Multi-nozzle modification
Written by Ben
Last updated on 2008-01-13
Many water guns have only a single nozzle. Nozzles can be drilled to change them, but for the most flexibility, some sort of nozzle selector should be added. This modification adds threaded endcap nozzles, which do not switch quickly, but are cheap, easy to make, and offer endless possibilities in nozzle diameters.
There also is the option of making a rotating nozzle selector, but no one has done that as of yet. A rotating selector can be made from PVC parts, but unless heavier work is done, the nozzles will have to be "plugged in" to a PVC coupler. A few PVC plugs attached in a circle on a dowel could work as a rotating nozzle selector.
Materials
The materials will differ depending on the gun being modified. These materials are general.
- 3/4" threaded endcaps
- 3/4" male adaptor (3/4" female end to 3/4" male threaded end)
- electrical tape or putty epoxy
- hacksaw
- clamp
- blocks of wood (to help the clamp)
- file or coarse sandpaper
- a knife
Instructions
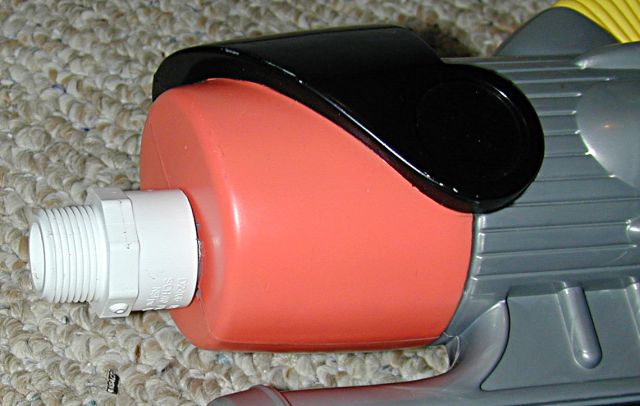
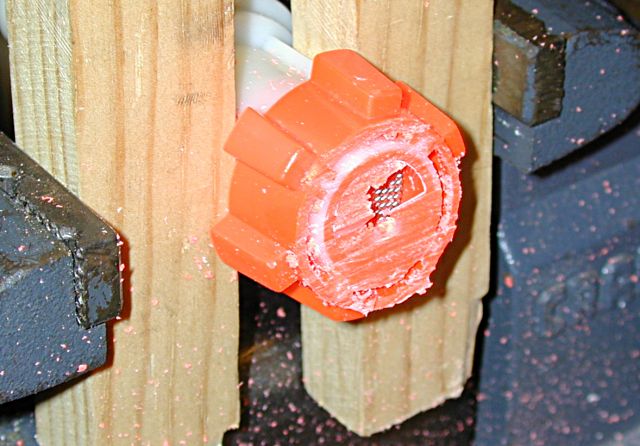
Open up your gun. You will be modifying the nozzle. Note that one some guns you can unscrew the nozzle from the firing valve. If your water gun can do that, remove the nozzle piece because you won't have the internals sticking out of the other end of the clamp.
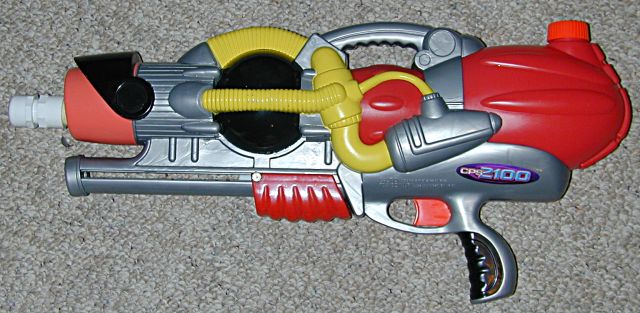
Put the nozzle in the clamp. Get the saw out, and start cutting. Be careful not to saw too deep. You want to keep the mesh screens and straws that improve stream lamination. On my CPS 2100 I removed the nozzle with a few millimeters of space before it hits the metal screen. It's that close. I sawed about a millimeter after the seam on my 2100.
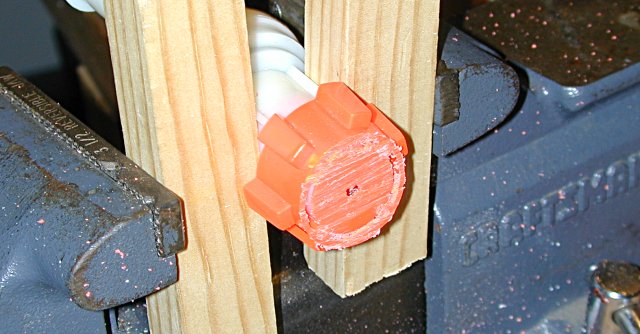
Note the blocks of wood to prevent the clamp from squishing the nozzle. I am getting close. Sawing off another millimeter made the nozzle look like the next picture.
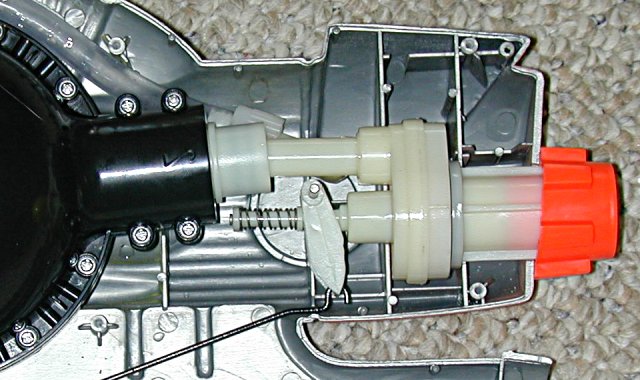
I am nearly through. The orange plastic in the nozzle is very thin. I can break through it with a knife. Remove the remaining plastic on the sides and the plastic inside the nozzle, but watch out for the screens, as you may damage them. You might want to use some sandpaper to smooth the plastic so the stream comes out cleaner.
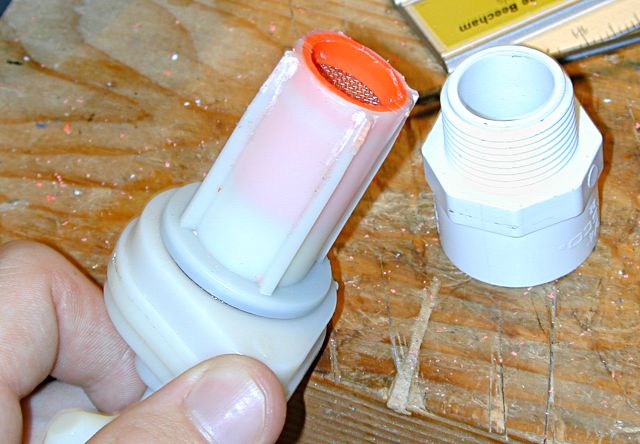
You can see the mesh screen. Note the 3/4" male adapter to the right. Those ridges prevent the adapter from being put over the nozzle, so use a file or sandpaper to remove them. There will be some plastic bits stuck in the screen, so knock most of them out. Later they all will be removed by firing the water gun.
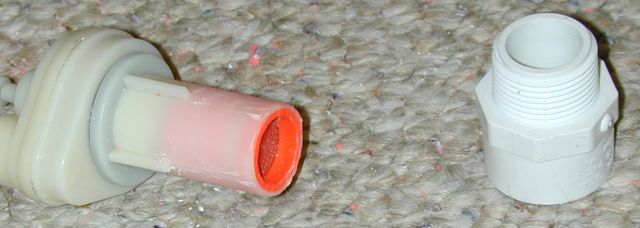
The ridges are removed. Now you have to wrap electrical tape around the end of the nozzle until it makes a snug fit with the 3/4" male adapter. I used duct tape here and it didn't work very well. Electrical should work better. You also can use putty epoxy if you want the most permanent fit and seal.
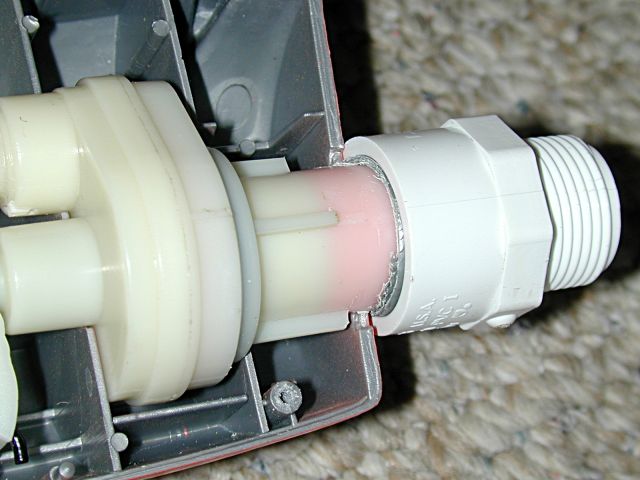
Reassemble the water gun. Blast out any remaining plastic bits that might be in the nozzle by firing the gun without threading a nozzle on. Drill a variety of threaded caps into nozzles and enjoy the improved water gun!
Instructions for a Super Soaker Arctic Blast
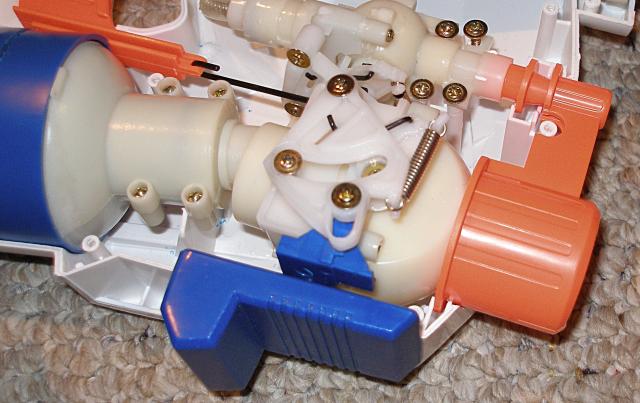
You have to remove the orange nozzle cover. Take off the screws holding the valve assembly down to lift it up.
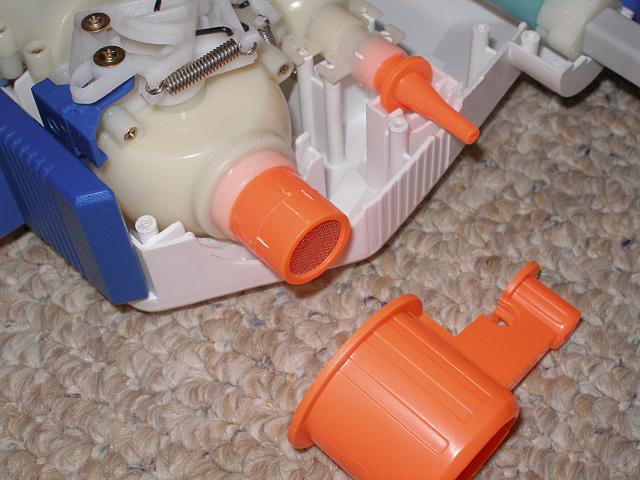
The photo above shows the orange nozzle cover removed.
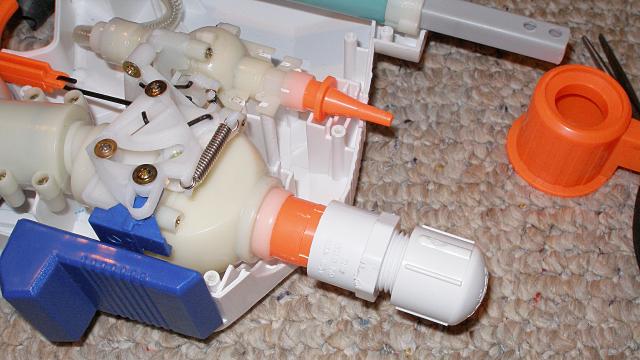
I simply pushed a 1/2 inch male threaded adapter on to the old flood nozzle. The fit is relatively tight, so nothing else is necessary. If you want a more permanent nozzle, epoxy the adapter on.
Nozzles
This water gun now uses 3/4 inch threaded nozzles. How to make them is shown in the APH guide.
The completed product